So, you're looking to make your SD card NTFS for Shinobi Monitor, huh? Well, you've come to the right place. In this guide, we'll walk you through everything you need to know about formatting your SD card to NTFS and why it’s crucial for Shinobi Monitor users. Whether you're a tech enthusiast or just someone trying to get their security system up and running, we've got you covered. So grab a cup of coffee, sit back, and let's dive in!
Let’s face it—Shinobi Monitor is one of the best open-source solutions for managing security cameras. But here's the deal: to get the most out of it, you need to make sure your storage is optimized. That’s where formatting your SD card to NTFS comes in. NTFS offers better performance, stability, and compatibility, especially when dealing with large files like video recordings.
Now, I know what you're thinking: "Does it have to be this complicated?" Trust me, it doesn’t. By the end of this article, you'll have a solid understanding of why NTFS is the way to go, how to format your SD card, and how to integrate it seamlessly with Shinobi Monitor. Let's get started!
Read also:Kulhad Pizza Viral Video Download Free Hd Everything You Need To Know
Why NTFS is the Best Choice for Shinobi Monitor
Before we jump into the nitty-gritty, let’s talk about why NTFS is the go-to file system for Shinobi Monitor users. NTFS, or New Technology File System, is Microsoft’s preferred file system for modern operating systems. It’s designed to handle large files, offer better security, and provide more reliable storage solutions compared to alternatives like FAT32 or exFAT.
Here are some key benefits:
- Large File Support: NTFS can handle files larger than 4GB, which is perfect for storing high-resolution video recordings.
- Improved Performance: NTFS is optimized for speed and efficiency, making it ideal for continuous recording.
- Reliability: With features like journaling, NTFS ensures data integrity even in the event of a system crash.
- Security: NTFS allows for advanced permissions and encryption, giving you more control over your data.
In short, if you want your Shinobi Monitor setup to run smoothly and efficiently, NTFS is the way to go. Let’s move on to the next step: formatting your SD card.
How to Format SD Card to NTFS for Shinobi Monitor
What You’ll Need
Before we begin, make sure you have the following:
- An SD card with at least 16GB of storage (bigger is better).
- A computer with Windows or macOS.
- An SD card reader if your computer doesn’t have an SD card slot.
- Backup any important data on the SD card, as formatting will erase everything.
Got everything? Great! Let’s proceed to the next step.
Step-by-Step Guide to Formatting SD Card
Formatting your SD card to NTFS is a straightforward process. Follow these steps:
Read also:Collars And Co Net Worth 2023 A Detailed Insight Into Their Financial Success
- Insert the SD card into your computer using the SD card reader.
- Open File Explorer (Windows) or Finder (macOS).
- Locate the SD card in the list of drives.
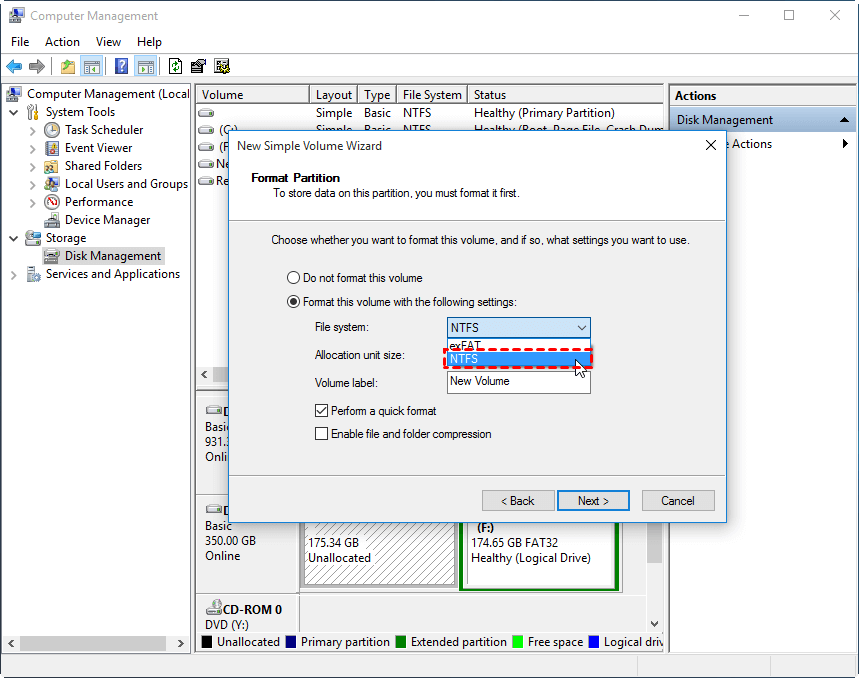
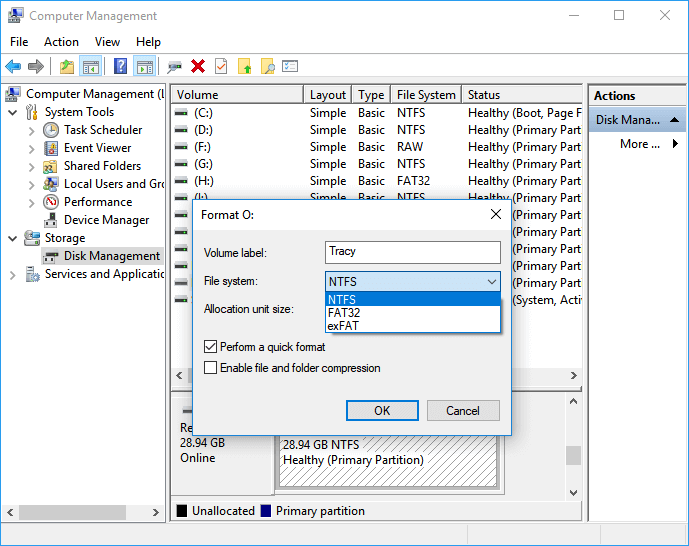
- Right-click on the SD card and select "Format" (Windows) or "Erase" (macOS).
- In the format options, choose "NTFS" as the file system.
- Give your SD card a name (e.g., "ShinobiStorage").
- Click "Start" or "Erase" to begin the formatting process.
- Wait for the process to complete. This may take a few minutes depending on the size of the SD card.
And that’s it! Your SD card is now formatted to NTFS and ready for use with Shinobi Monitor.
Compatibility Check: Is NTFS Right for Your Setup?
While NTFS is generally the best choice for Shinobi Monitor, it’s important to ensure that your system supports it. Here are a few things to keep in mind:
- Operating System: NTFS is fully supported by Windows and macOS, but some Linux distributions may require additional configuration.
- Device Compatibility: Make sure your camera or recording device supports NTFS. If not, you may need to use a different file system.
- Performance: NTFS is optimized for performance, but it may require more system resources compared to other file systems.
If you’re unsure about compatibility, consult the documentation for your specific setup or reach out to the Shinobi Monitor community for advice.
Troubleshooting Common Issues
Error: "Unable to Format SD Card to NTFS"
Occasionally, you may encounter issues when trying to format your SD card to NTFS. Here are some common problems and solutions:
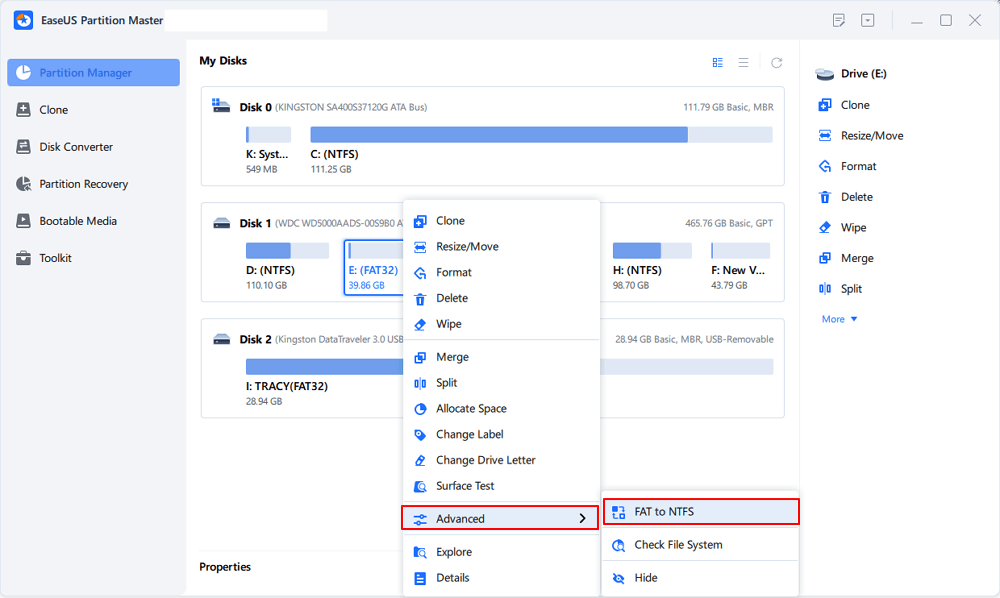
- Error Code 0x80070570: This usually indicates a corrupted file system. Try using a third-party tool like EaseUS Partition Master to repair the SD card before formatting.
- Insufficient Permissions: Ensure you have administrative privileges on your computer. If not, log in as an administrator and try again.
- SD Card Issues: If the SD card is damaged or counterfeit, formatting may fail. Replace the SD card with a high-quality one.
If none of these solutions work, consider reaching out to a professional or the Shinobi Monitor community for further assistance.
Optimizing Storage for Shinobi Monitor
Choosing the Right SD Card
Not all SD cards are created equal. When selecting an SD card for Shinobi Monitor, consider the following:
- Capacity: Aim for at least 64GB, but 128GB or higher is recommended for long-term storage.
- Speed Class: Look for cards with UHS-I or U3 speed ratings for faster read/write speeds.
- Brand: Stick to reputable brands like SanDisk, Kingston, or Samsung for reliability.
Investing in a high-quality SD card will ensure better performance and longevity for your Shinobi Monitor setup.
Integrating NTFS SD Card with Shinobi Monitor
Step 1: Mount the SD Card
Once your SD card is formatted to NTFS, you’ll need to mount it in your Shinobi Monitor system. Here’s how:
- Insert the SD card into your computer or server running Shinobi Monitor.
- Open the Shinobi Monitor dashboard.
- Go to the "Storage" settings and select "Add New Storage Device."
- Follow the prompts to configure the SD card as a storage location.
That’s it! Your NTFS SD card is now integrated with Shinobi Monitor.
Step 2: Configure Recording Settings
To make the most of your NTFS SD card, you’ll want to configure the recording settings in Shinobi Monitor:
- Resolution: Choose the appropriate resolution for your cameras. Higher resolutions will use more storage but provide better image quality.
- Frame Rate: Adjust the frame rate to balance storage usage and video quality.
- Compression: Use H.264 or H.265 codecs for efficient compression without sacrificing quality.
Experiment with these settings to find the perfect balance for your setup.
Advanced Tips for NTFS Optimization
Enable Disk Defragmentation
Over time, your NTFS SD card may become fragmented, leading to slower performance. To prevent this, enable disk defragmentation:
- Open File Explorer and locate your NTFS SD card.
- Right-click on the SD card and select "Properties."
- Go to the "Tools" tab and click "Optimize."
- Schedule regular defragmentation to keep your SD card running smoothly.
This simple step can significantly improve the performance of your NTFS SD card.
Use Disk Cleanup Tools
To free up space on your NTFS SD card, use disk cleanup tools like CCleaner or Disk Cleanup:
- Delete Temporary Files: Remove unnecessary files to free up space.
- Empty Recycle Bin: Clear out deleted files to reclaim storage.
- Uninstall Unused Software: Remove any unnecessary software or applications.
Regularly cleaning your SD card will ensure it has enough space for your recordings.
Conclusion
And there you have it—everything you need to know about making your SD card NTFS for Shinobi Monitor. From understanding the benefits of NTFS to formatting your SD card and integrating it with your system, we’ve covered it all. By following this guide, you’ll have a reliable and efficient storage solution for your security setup.
Now it’s your turn to take action! Try formatting your SD card to NTFS and see the difference it makes in your Shinobi Monitor experience. Don’t forget to share your thoughts and experiences in the comments below. And if you found this article helpful, feel free to share it with your friends and fellow tech enthusiasts.
Stay safe, stay secure, and happy monitoring!
Table of Contents
- Why NTFS is the Best Choice for Shinobi Monitor
- How to Format SD Card to NTFS for Shinobi Monitor
- Compatibility Check: Is NTFS Right for Your Setup?
- Troubleshooting Common Issues
- Optimizing Storage for Shinobi Monitor
- Integrating NTFS SD Card with Shinobi Monitor
- Advanced Tips for NTFS Optimization
- Conclusion